RAID 0 Recovery

A RAID 0 (also known as a stripe set or striped volume) splits data evenly across two or more disks (striped) with no parity information for redundancy. It is important to note that RAID 0 was not one of the original RAID levels and provides no data redundancy. RAID 0 is normally used to increase performance, although it can also be used as a way to create a small number of large virtual disks out of a large number of small physical ones.

A RAID 0 can be created with disks of differing sizes, but the storage space added to the array by each disk is limited to the size of the smallest disk. For example, if a 120 GB disk is striped together with a 100 GB disk, the size of the array will be 200 GB.

To Recover the RAID:

  1. Ensure the problem RAID drives are properly connected to your computer. Ensure that you can hear the drives spinning and that there are no signs (or sounds) of a physically failed drive;

  2. Run Recover My Files v4, select the "Recover Drive" path and click Next;

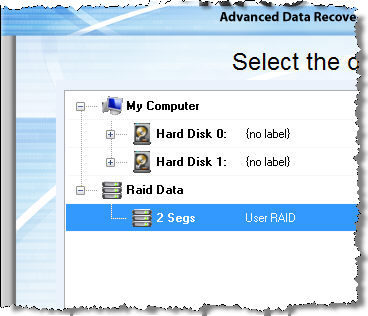
  3. In the Drive Selection window, click on the button. This opens the RAID configuration window. Click here for a summary of functions in this window.;

  4. In the Add Raid window, select the type of RAID you are trying to recover and click the button to add the RAID drives (Note: if you have taken image copies of the drive [DD, RAW, EnCase etc] use the "Add Image..." button);

Is the RAID a Hardware RAID or Software RAID?

Once added, select and search the RAID drive

Once the RAID has been added to the list of available drives, select the RAID as the drive to search and click Next:

The RAID drive can now be search like any other drive on your system. In most cases, because of the initial problem with the RAID, it will be best to run the Recover Drive mode. However, it is also possible to search the drive in Recover Files mode.